
The beauty of having a blog instead of just a podcast is now, I can show you all some cool stuff that isn't as easy to explain over audio. One obvious thing is any topic to do with views. This particular topic is actually from a Learn Swift LA meetup that I led back in May of last year. It came about because someone introduced me to the UIDynamicAnimator, and I found it so fun and easy to learn that I needed to show it off in the next meetup.
Here's what we're going to do. We're going to make an air hockey game. This works best on an iPad, but you can totally play this on your iPhone as well. Air hockey is a two player game, so be sure to grab friend when you're done and totally dominate them with your superior coding and mad puck skills! To get the most out of this post code along with me. I'll give you step-by-step instructions all the way down.
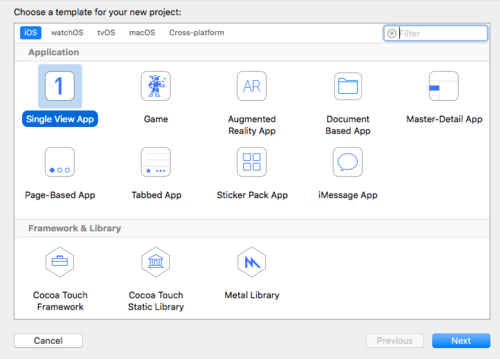
Start by creating a new Xcode iOS project. Choose a new Single View App and click Next.
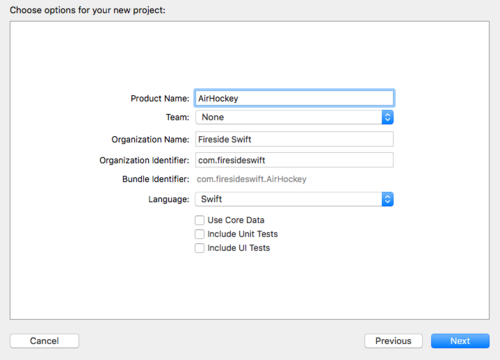
Let's name our project AirHockey. Don't forget to set the Language to Swift. We also don't need Core Data or tests for this project, so you can safely uncheck those before clicking Next.
Pick a place to save your new project and click Create. Now we're really ready to begin.
Now this app will work best on iPad, but it can most definitely work on iPhone as well. So let's keep the Devices set to "Universal", but we don't want the screen to rotate at all, so only have Portrait checked. I don't remember the earliest SDK we can use for this app, but I do know it works well with iOS 10, so let's set that as our Deployment Target.
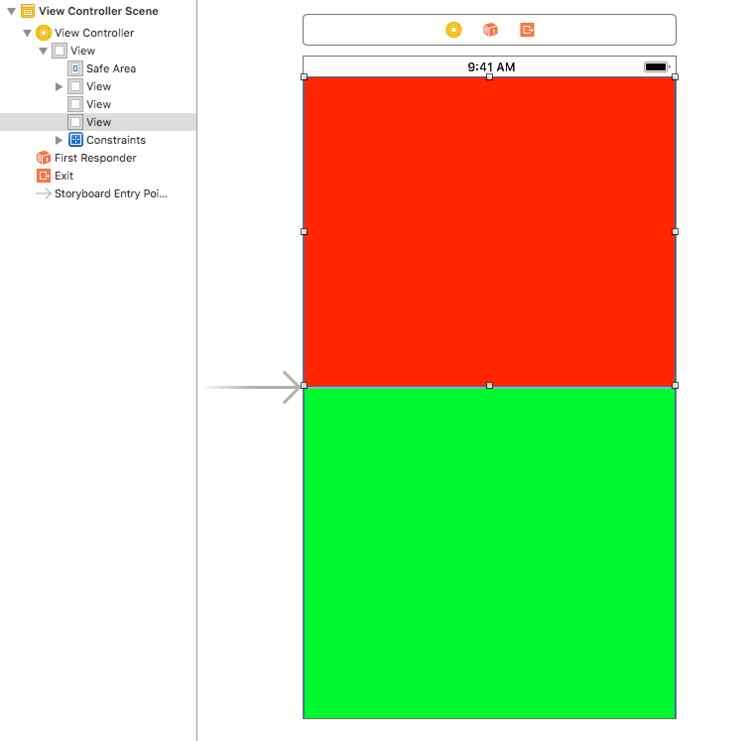
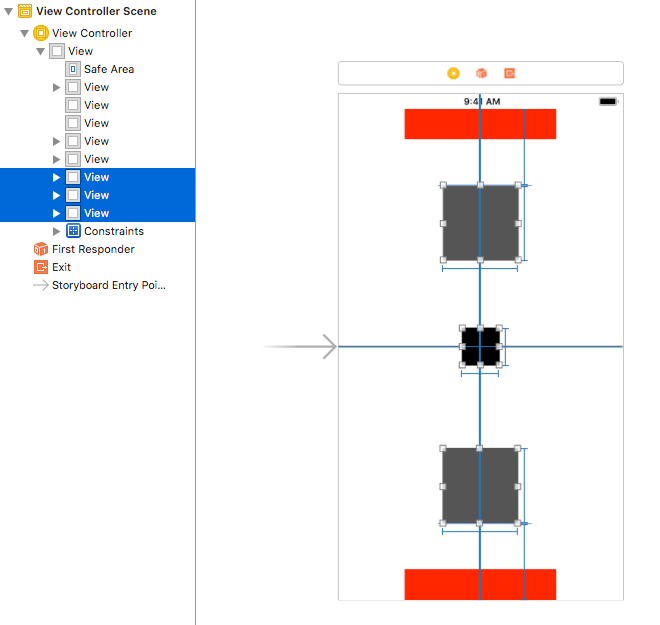
I like working with Storyboards. This part sucks for blog posts, because there's a lot to do, but I don't want to have a million screenshots. We're only going to add 7 UIViews to our initial ViewController, so it shouldn't be too bad. Start by adding the center view. It's hard to see in the screenshot below, but it's 3 pixels high, centered vertically, and spans the width of the view. Then add the top view. Constrain it to the edges of the Safe Area and the top of the center view. Finally add the bottom view, and constrain it to the edges of the Safe Area and the bottom of the center view. I made the colors red and green to make them more obvious. We want the final color to be white like a hockey rink.
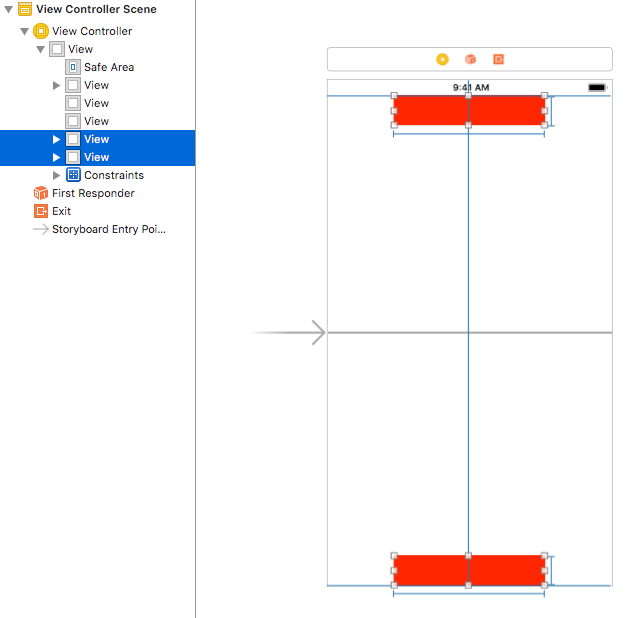
Now we need to add the goals. Like I said earlier, these work better for the iPad, but will totally still work for iPhone as well. I'm using an iPhone layout, because it's easier to see in a blog post. The goals are just UIViews like the other views we added. Now this is VERY important. These views must be subviews of the ViewController's view not subviews of the top and bottom views we added earlier. Note the hierarchy on the left outline panel. For sizes, I'm setting the height to 40 and the width to 200. Feel free to set them to your preference.
Finally we need to add the paddles and the puck. Just like before, we need to have all our objects in the same view hierarchy. Constrain your puck to the vertical and horizontal centers of the view. For the paddles, constrain them to the horizontal center of the view and about 100 px from the top or bottom of the view respectively. I used a size of 100x100 for my paddles and 50x50 for my puck, but you can play with that to see what works for you. When you finish this step, run your code to make sure everything looks the way you want it to look.
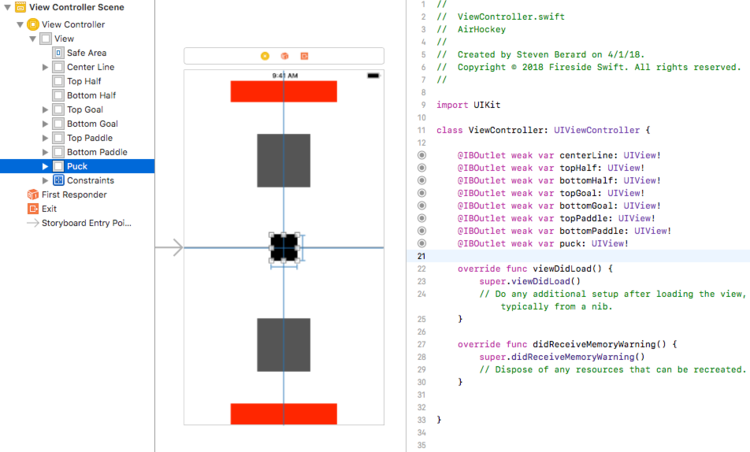
Next, connect outlets to all of these views, so we can reference them in our code. For those of you who haven't done this before, with the assistant editor open, you can hold the control button, click on a view, and drag into your code. A dialog box will appear to let you name your new outlet.
Alright, now all the view setup is done, we can start playing with code. Navigate to your ViewController class, and add this property near the top:
class ViewController: UIViewController {

    var animator: UIDynamicAnimator!

    ...
}
This UIDynamicAnimator is the key to making this all work. It's pretty amazing how much power you have just by adding this little guy to your code. To demonstrate, let's add a little gravity. Add this to your viewDidLoad() method and run it.
override func viewDidLoad() {
    super.viewDidLoad()

    animator = UIDynamicAnimator(referenceView: view)

    let gravityBehavior = UIGravityBehavior(items: [puck])
    animator.addBehavior(gravityBehavior)
}
Your puck just fell off the screen! Now that's interesting. We can even control the direction and magnitude of gravity. Add this to your code now and run it.
    let gravityBehavior = UIGravityBehavior(items: [puck])
    gravityBehavior.gravityDirection = CGVector(dx: 0, dy: -1)
    animator.addBehavior(gravityBehavior)
Now the puck flies up through the top of the screen! So much power!!! But it does suck that the puck leaves the screen, so let's make it stay in our view. We'll need this for our game anyway. Add a collision behavior.
    let collisionBehavior = UICollisionBehavior(items: [puck])
    collisionBehavior.translatesReferenceBoundsIntoBoundary = true
    animator.addBehavior(collisionBehavior)
Now the puck stops at the top of your view with a little bounce. That's pretty nice. We want the puck to collide with the paddles, so let's add them to this same collision behavior.
    let collisionBehavior = UICollisionBehavior(items: [puck, topPaddle, bottomPaddle])
    collisionBehavior.translatesReferenceBoundsIntoBoundary = true
    animator.addBehavior(collisionBehavior)
This is interesting. Now the puck runs into the top paddle, but the gravity still exists, and the puck pushes the paddle to the top of the view where it stays. This is close to what we want, but we really don't need the gravity for our game, so let's remove it.
//        let gravityBehavior = UIGravityBehavior(items: [puck])
//        gravityBehavior.gravityDirection = CGVector(dx: 0, dy: -1)
//        animator.addBehavior(gravityBehavior)
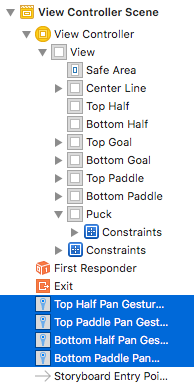
What we really want is to control our paddles. For this we need some pan gesture recognizers. From the storyboard, add a pan gesture to the topHalf, topPaddle, bottomHalf, and bottomPaddle views. Be sure to label them each time you add them, or it will get very confusing when we connect them to their actions.
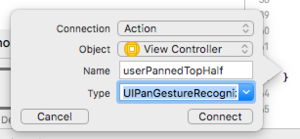
Create a new IBAction called userPannedTopHalf() and connect both the topHalf and topPaddle pan gestures to it. Make sure to set the type to UIPanGestureRecognizer when you create the new action.
Do the same thing with the bottom pan gestures, but create an IBAction called userPannedBottomHalf. Add this code your ViewController, and run your code.
class ViewController: UIViewController {
    ...
    var topSnapBehavior: UISnapBehavior?
    var bottomSnapBehavior: UISnapBehavior?
    ...

        @IBAction func userPannedTopHalf(_ sender: UIPanGestureRecognizer) {
        if topSnapBehavior != nil {
            animator.removeBehavior(topSnapBehavior!)
        }

        switch sender.state {
        case .began, .changed:
            topSnapBehavior = UISnapBehavior(item: topPaddle, snapTo: sender.location(in: view))
            animator.addBehavior(topSnapBehavior!)
        default:
            break
        }
    }

    @IBAction func userPannedBottomHalf(_ sender: UIPanGestureRecognizer) {
        if bottomSnapBehavior != nil {
            animator.removeBehavior(bottomSnapBehavior!)
        }

        switch sender.state {
        case .began, .changed:
            bottomSnapBehavior = UISnapBehavior(item: bottomPaddle, snapTo: sender.location(in: view))
            animator.addBehavior(bottomSnapBehavior!)
        default:
            break
        }
    }
}
Now when you move your finger in the bottomHalf of the screen, the bottom paddle snaps to your finger. You can then use this to hit the puck. Pretty cool, huh? And you can do this with the top paddle as well. You can even "throw" your paddle like Thor throws his hammer, and like his hammer, it'll come right back to you by moving your finger a little bit on your side.
This is a pretty good place to stop for this post. You have a functioning ice rink with no need for a zamboni. You have two functioning paddles with a puck. (Ok, they're square, which is a little weird.) Next time we'll make the paddles and the puck circular, enforce side rules, and add in a scoring mechanic. Feel free to try to do these things yourself in the meantime. Trust me, you'll learn more by exploring than by me telling you. Until then, happy coding!
-Steve
P.S. Here the final code, so you can check your code against mine.